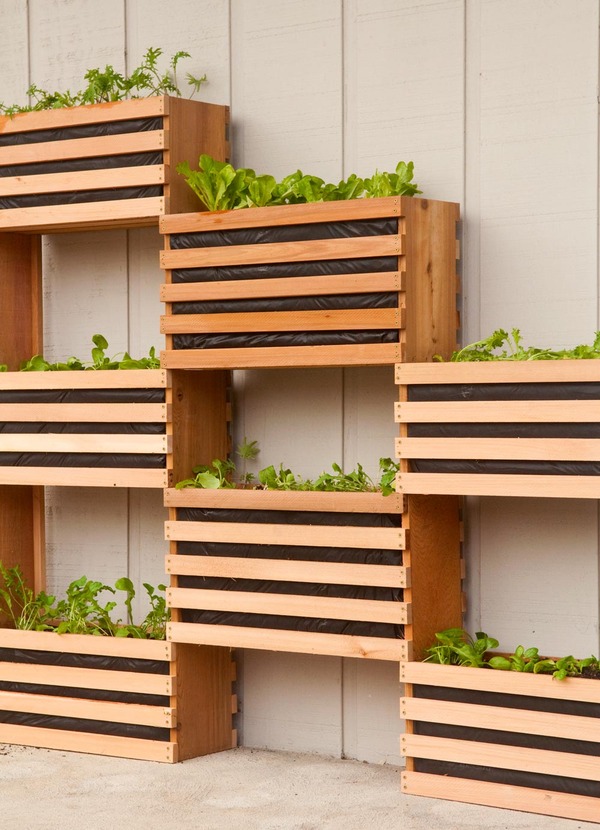
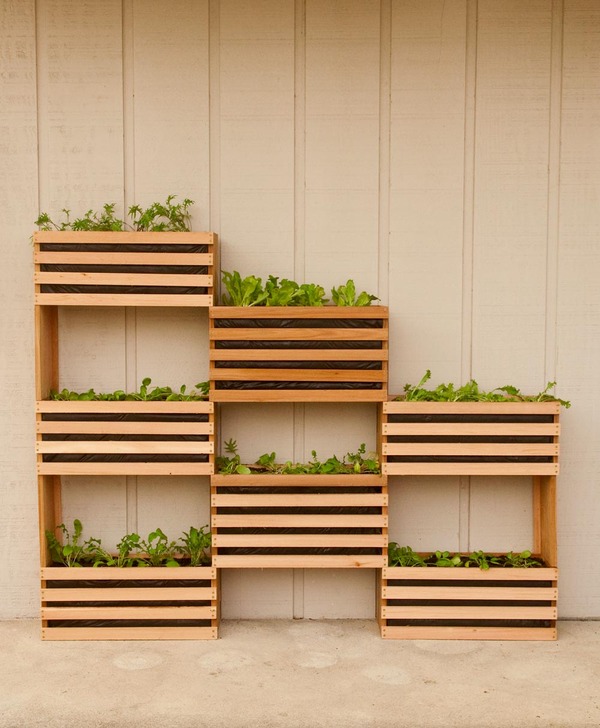
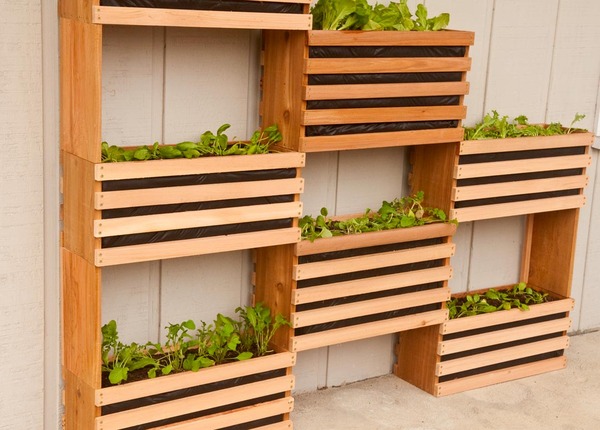
This contemporary, modular yard project works well in any area. Since it uses timber containers, you don’t have to fret regarding the high quality of your existing dirt, and they can rest on any type of surface: yard, concrete, gravel and even a wooden deck. The yard’s vertical alignment allows you expand an entire lot of veggies, natural herbs, and blossoms in a tiny impact.Packages are customizable to fit your room – all you require is strong wall or fencing to attach the structure to, and you can place this guy anywhere.
Products & Tools Needed
- Miter or round saw.
- Cordless drill and also 1/2 inch drill bit.
- Staple weapon and 1/2 electric cable staples.
- Hammer.
- Tape measure.
- Gloves.
- Safety and security glasses as well as dust mask.
- Pencil.
- Scissors.
- Tin cuts or cutting pliers.
- 3x 8′ long cedar 1x8s.
- 4x 8′ lengthy cedar 1x3s.
- 16x 8′ lengthy cedar 1x2s.
- 1 roll of cord equipment towel.
- 1 roll weed blocker fabric.
Constructing the Boxes
I developed my project out of one-by cedar product. Given that my yard was going to be outdoors, I recognized it would have great deals of call with water and direct sunlight, so I chose cedar for its all-natural decay-resistant residential properties. I would never utilize pressure-treated lumber for this, as it consists of chemicals that will leach into the soil where my edibles are growing.
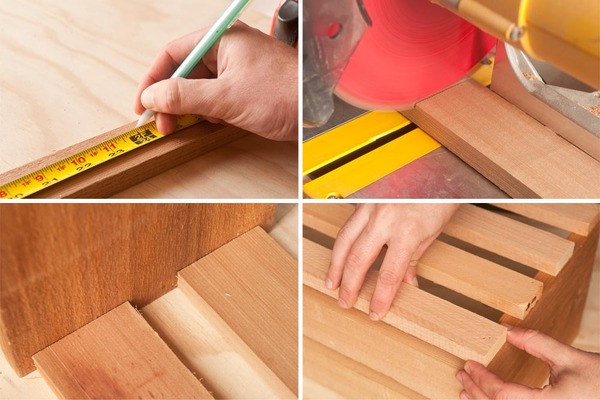
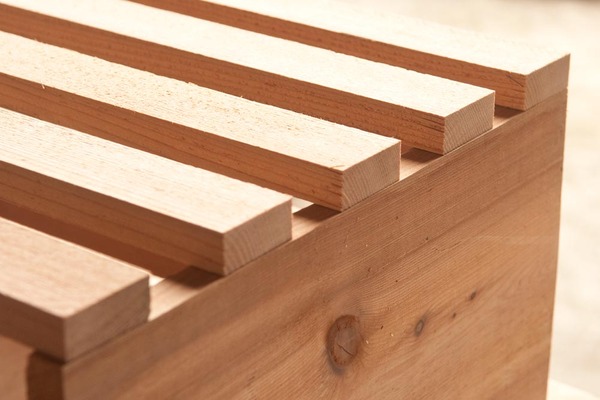
The sides are made from cedar 1x8s, cut to 10. 2 cedar 1x3s make up the base, 21 1/2 in size, to offer the lower strength.
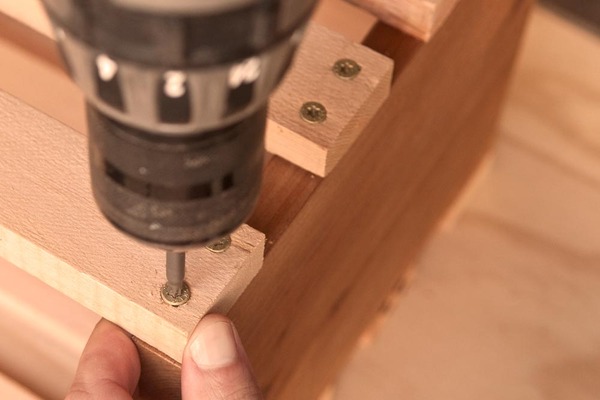
The slats on the sides are made from cedar 1×2 material, cut to 23. This dimension allows you to use an 8′ 1×2 to reduce 4 slats for the front, while enabling waste from the saw kerf. Be certain to position them flush with the top as well as bottom of the box, concealing the 1×3 base when viewed from the front. Simply area them equally by eye, concerning 1 to 1 1/2 apart. Affix them with 1 1/2 long # 8 outdoor decking screws. Because you’re screwing so near to the edge of the wood, you’ll certainly desire to drill pilot openings to avoid splitting the wood..
To give the protected boxes a bit even more space, the facility boxes are 12 3/4 high, as well as utilize 5 slats to compose the front as well as back.
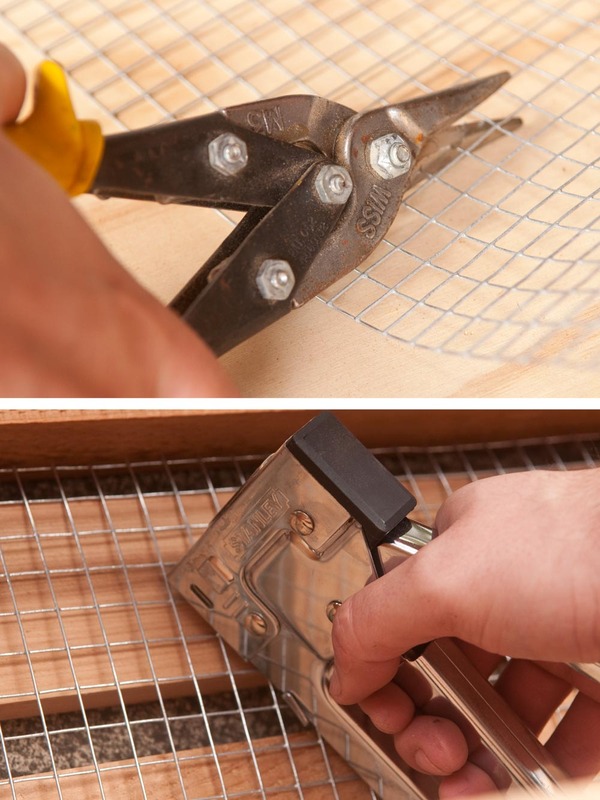
When your boxes are put together, reduced 1/2 fit together hardware cloth using snips or reducing pliers, and staple it to the 1×3 base to comprise all-time low of packages.
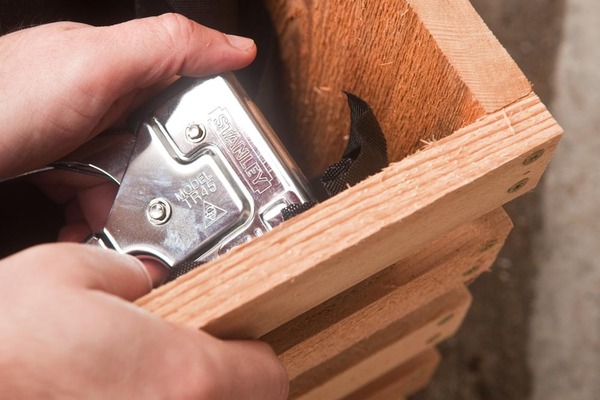
Line the sides and also the base with weed barrier fabric. To figure out the length, cover it around the exterior of the two sides and the base, like you would when covering a gift.
Assembling the Framework
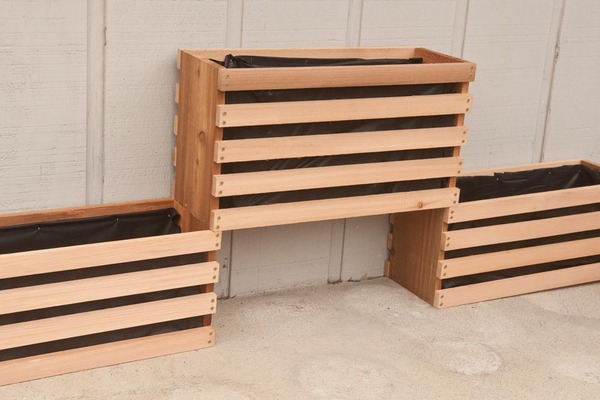
Begin by placing two of the shorter boxes on the ground, and also add a taller box to extend the void. As soon as you enjoy with their placement, screw them to the support product (the fence, wall surface, or what have you).
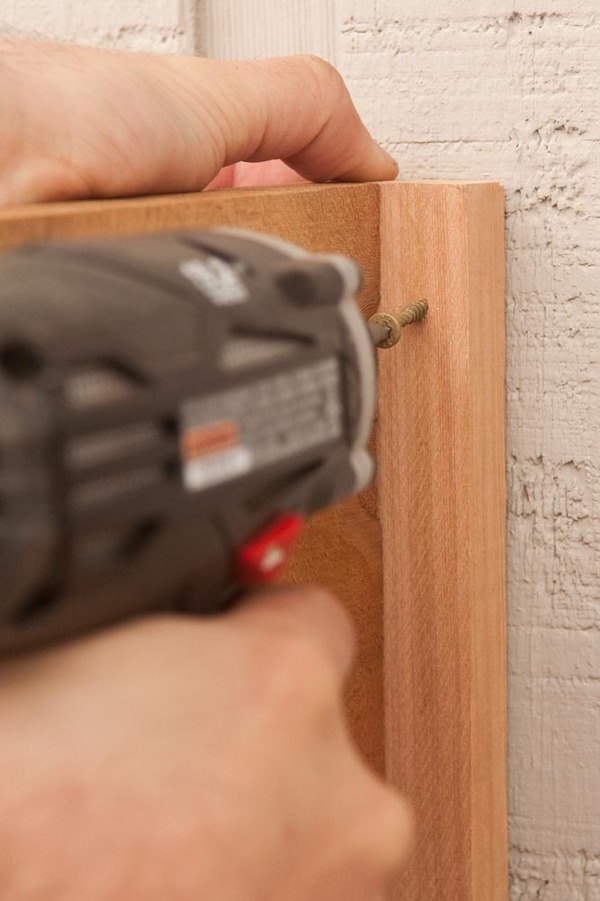
It’s cut to the same height as the taller boxes – 12 3/4 – and also is a piece of 1×8 with a 1×2 screwed perpendicularly to the back. Line it up carefully with the base box, as well as attach.
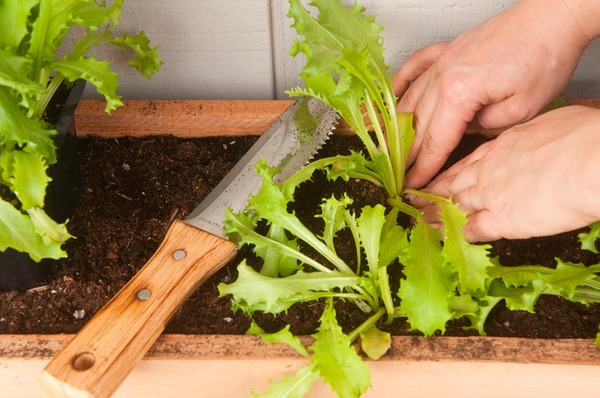
Remain to develop your structure till all the boxes as well as risers are affixed and also protected. Load them with potting soil, and include your plants
.
More Gardening Ideas & Resources
Article source: http://www.manmadediy.com/users/chris/posts/3582