When we got house from being away I was a little bit flabbergasted (spelled that correctly RIGHT out of eviction, I’m happy to say) at the size of everything in the garden.
Over the course of a week I pretty much went from enjoyable, cottage garden to the last scene in Jurassic Park where there was an unique possibility something may come yelling out of the yard and rip your wind pipeline out.
My garlic was all set to select. Not just all set, but most likely even a touch over all set. Since I planted the garlic last fall and we have actually had such a warm winter season followed by a hot, hot summer, my garlic grew nearly a month earlier than regular.
It was time to get that garlic the hell out of the dirt. Or soil for you snooty types.
When to harvest it, I’ve been growing garlic since I was a teenager and yet … till a couple of years ago I didn’t understand. I.thought. When to harvest it, I understood. I was favorable in reality. I was incorrect. Positively wrong.
I constantly used to let my garlic dry out entirely prior to pulling it.
That is the totally incorrect way to harvest garlic. In case you’re looking for the WRONG way to harvest garlic, that’s your approach right there.
Now, if you’re looking for the right method to harvest garlic, here’s what you require to understand.
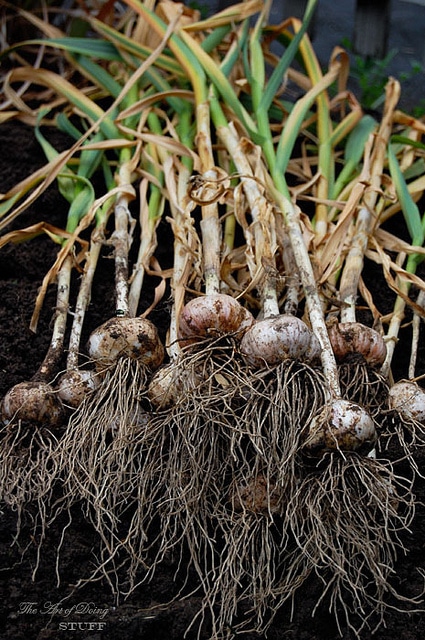
Garlic starts to dry and die up from the bottom up. When half of the garlic leaves are dried up the garlic is all set to be pulled.

Then the cloves will all dry up and pull away from the stem and fall apart, if you wait until the garlic is completely dried out. If you pull it too early the cloves will be small. Either way the garlic will not store well.
To actually pull the garlic, you require to dig it out with a shovel. You can’t simply pull it. Shovel, shovel, shovel … and then pull. Like so …
Garlic, like the majority of vegetables, is fragile. Treat it like an egg or a banana. If it gets bruised or cut it’ll rot rapidly.
Once you’ve dug up all your bulbs, wipe the majority of dirt off of the roots then hang your garlic to dry. It requires to be in a warm area where it gets air distributing around it, however out of the direct sun.
Your garlic requirements to treat like this for 2 weeks.
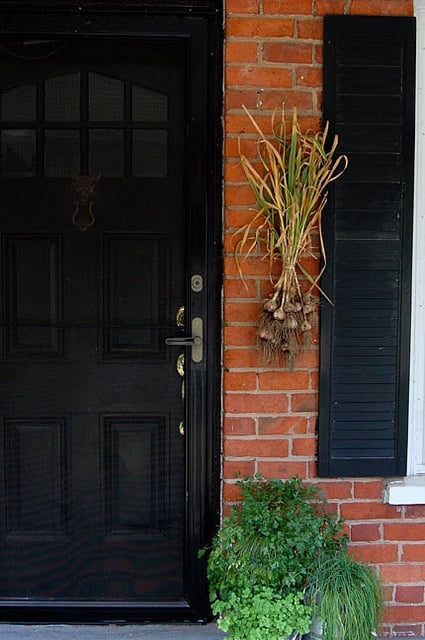
I’ve hung mine by my front door.
Due to the fact that I need it to dry all around, I’ll turn the package of garlic every few days to make certain it’s properly drying on all sides. If I hung it where it gets air circulation all around it but I like it hung by the front door, it ‘d be better. After the garlic has actually treated for 2 weeks, take it down and lay it out. Now you can reserve your greatest, best cloves for planting in the fall.
Put nevertheless lots of you want aside (1 clove will equal one head of garlic, so if you wish to grow 30 heads of garlic next year, you’ll need to save 30 cloves).
You can now cut the roots to 1/2– 1 inch and cut off the leaves. You can take the outer papery layer off to clean up the heads a bit. The skin below will be clean and white. Store in a mesh bag, or if you’re feeling fancy, braid your garlic (tutorial on that coming up next week) and hang it in a space that’s between 60 and 65 degrees F for storage. Treated and stored like this, garlic will last for up to 8 months. Unless you consume all of it.
More Gardening Ideas & Resources
Article source: http://www.theartofdoingstuff.com/when-to-dig-up-garlic-how-to-do-it/