
While I like the fresh veggies we get from our garden every year, I was not delighted about the amount we were losing to rabbits, deer, and other critters who were assisting themselves to the fruits ofmyeffort! I started taking a look at my regional garden supply stores for an option and encountered an excellent concept– a raised garden bed. This takes the idea of a raised garden bed one action further and puts it at waist level. Not just does this deter bunnies, deer, and so forth, it likewise makes weeding a breeze as you do not have to flex over.
I discovered this VegTrug raised bed at a local shop and fell in love. When I showed Jay, he recoiled at the cost and ensured me he could build me a bigger one for a fraction of the expense.

We headed to House Depot where we purchased everything we required for the job. We got:
Twenty 2 x 4 x 8 cedar boards
One 1 x 2 x 8 cedar board
A box of 2 1/2 screws
We had the following already at home:
A miter saw (If you are unable to cut your wood, a Home Depot worker will have the ability to cut them to the required sizes).
A drill and drill bits.
A tape step.

Here is how Jay went about building the raised bed
1) Cut the 2 x 4 pieces ( or have them cut) to the following sizes.
- 8 pieces cut to 3 feet, 11.75 inches (long side bed pieces).
- 8 pieces cut to 3 feet, 4 inches (brief side bed pieces).
- 4 pieces cut to 36 inches (long leg pieces).
- 4 pieces cut to 23 inches (top brief leg pieces).
- 4 pieces cut to 9.25 inches (bottom short leg pieces).
- 2 pieces cut to 36.75 inches (leg supports).
Jay stacked the boards according to size to keep them directly.

2) Begin with the legs of the bed. Screw together the long leg pieces and brief leg pieces so that they are flush on one end. You must wind up with four legs.

3) Take two of the completed legs and secure them to among the support leg boards. Repeat with the other 2 legs.
4) Connect the bottom short leg pieces just listed below the support board and screw into location on both sets of legs 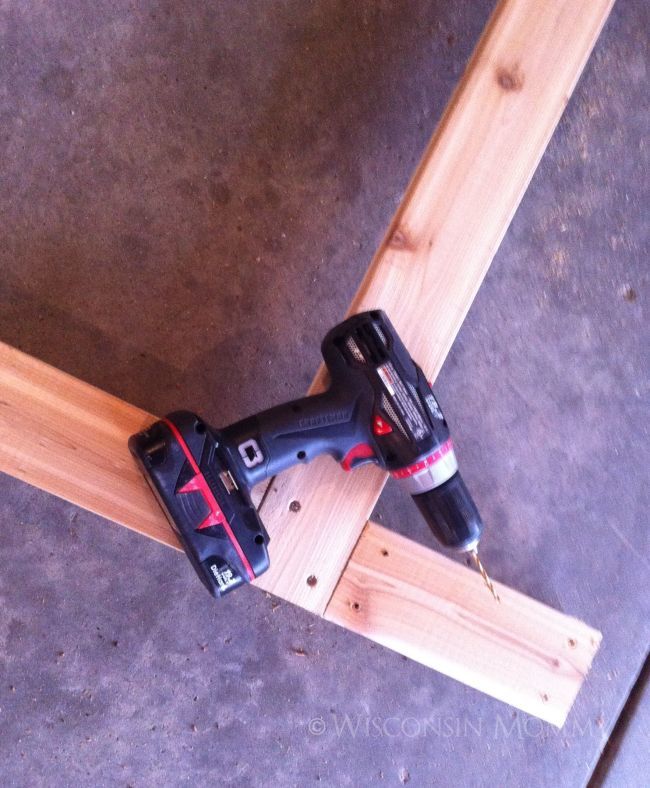
5) Stand the upper hands so that they form H’s with the cross piece toward the top. Take a long side bed piece and utilize it to connect the legs together as revealed in the picture. Repeat all the way around the bed.

6) Continue constructing the sides of the bed by putting the staying side pieces around the beyond the bed.


7) Once the sides are developed, screw the 1 x 2 piece along the inside, bottom of the sides to form a lip which will act as a base for the bottom.
8) Cut the remaining pieces to fit inside the bed and form the flooring. The measurements do not need to be precise– small gaps will allow water to stream through.


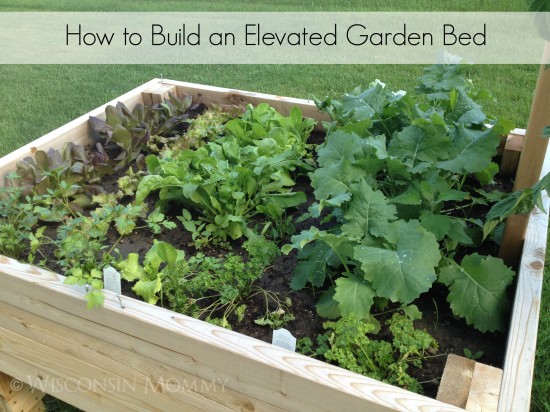
And voila !! You now have an elevated garden.
Pin it for later on

Article source: http://www.wisconsinmommy.com/build-elevated-raised-garden-bed/
📅 Last updated:
SHARE IT SO OTHERS CAN FIND THE BEST GARDENING INFO


