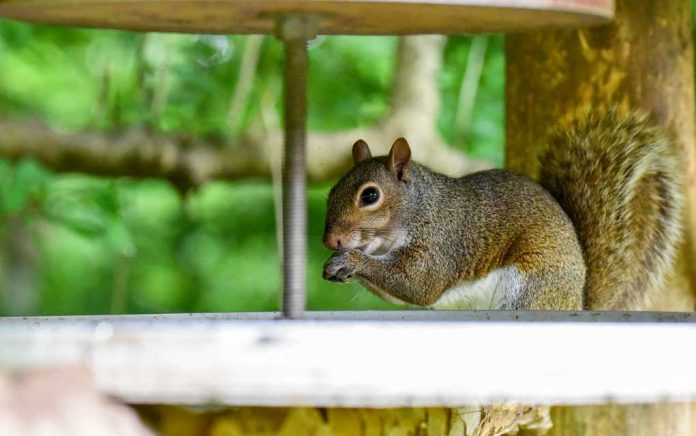
Is there anything more heartbreaking than watching a squirrel run off with one of your green cherry tomatoes, take a bite out of it, then toss it to the ground before going back to get another one?
That was the scene in our backyard last summer season.
Needless to say, learning how to construct a squirrel evidence garden enclosure has been on my order of business ever since.
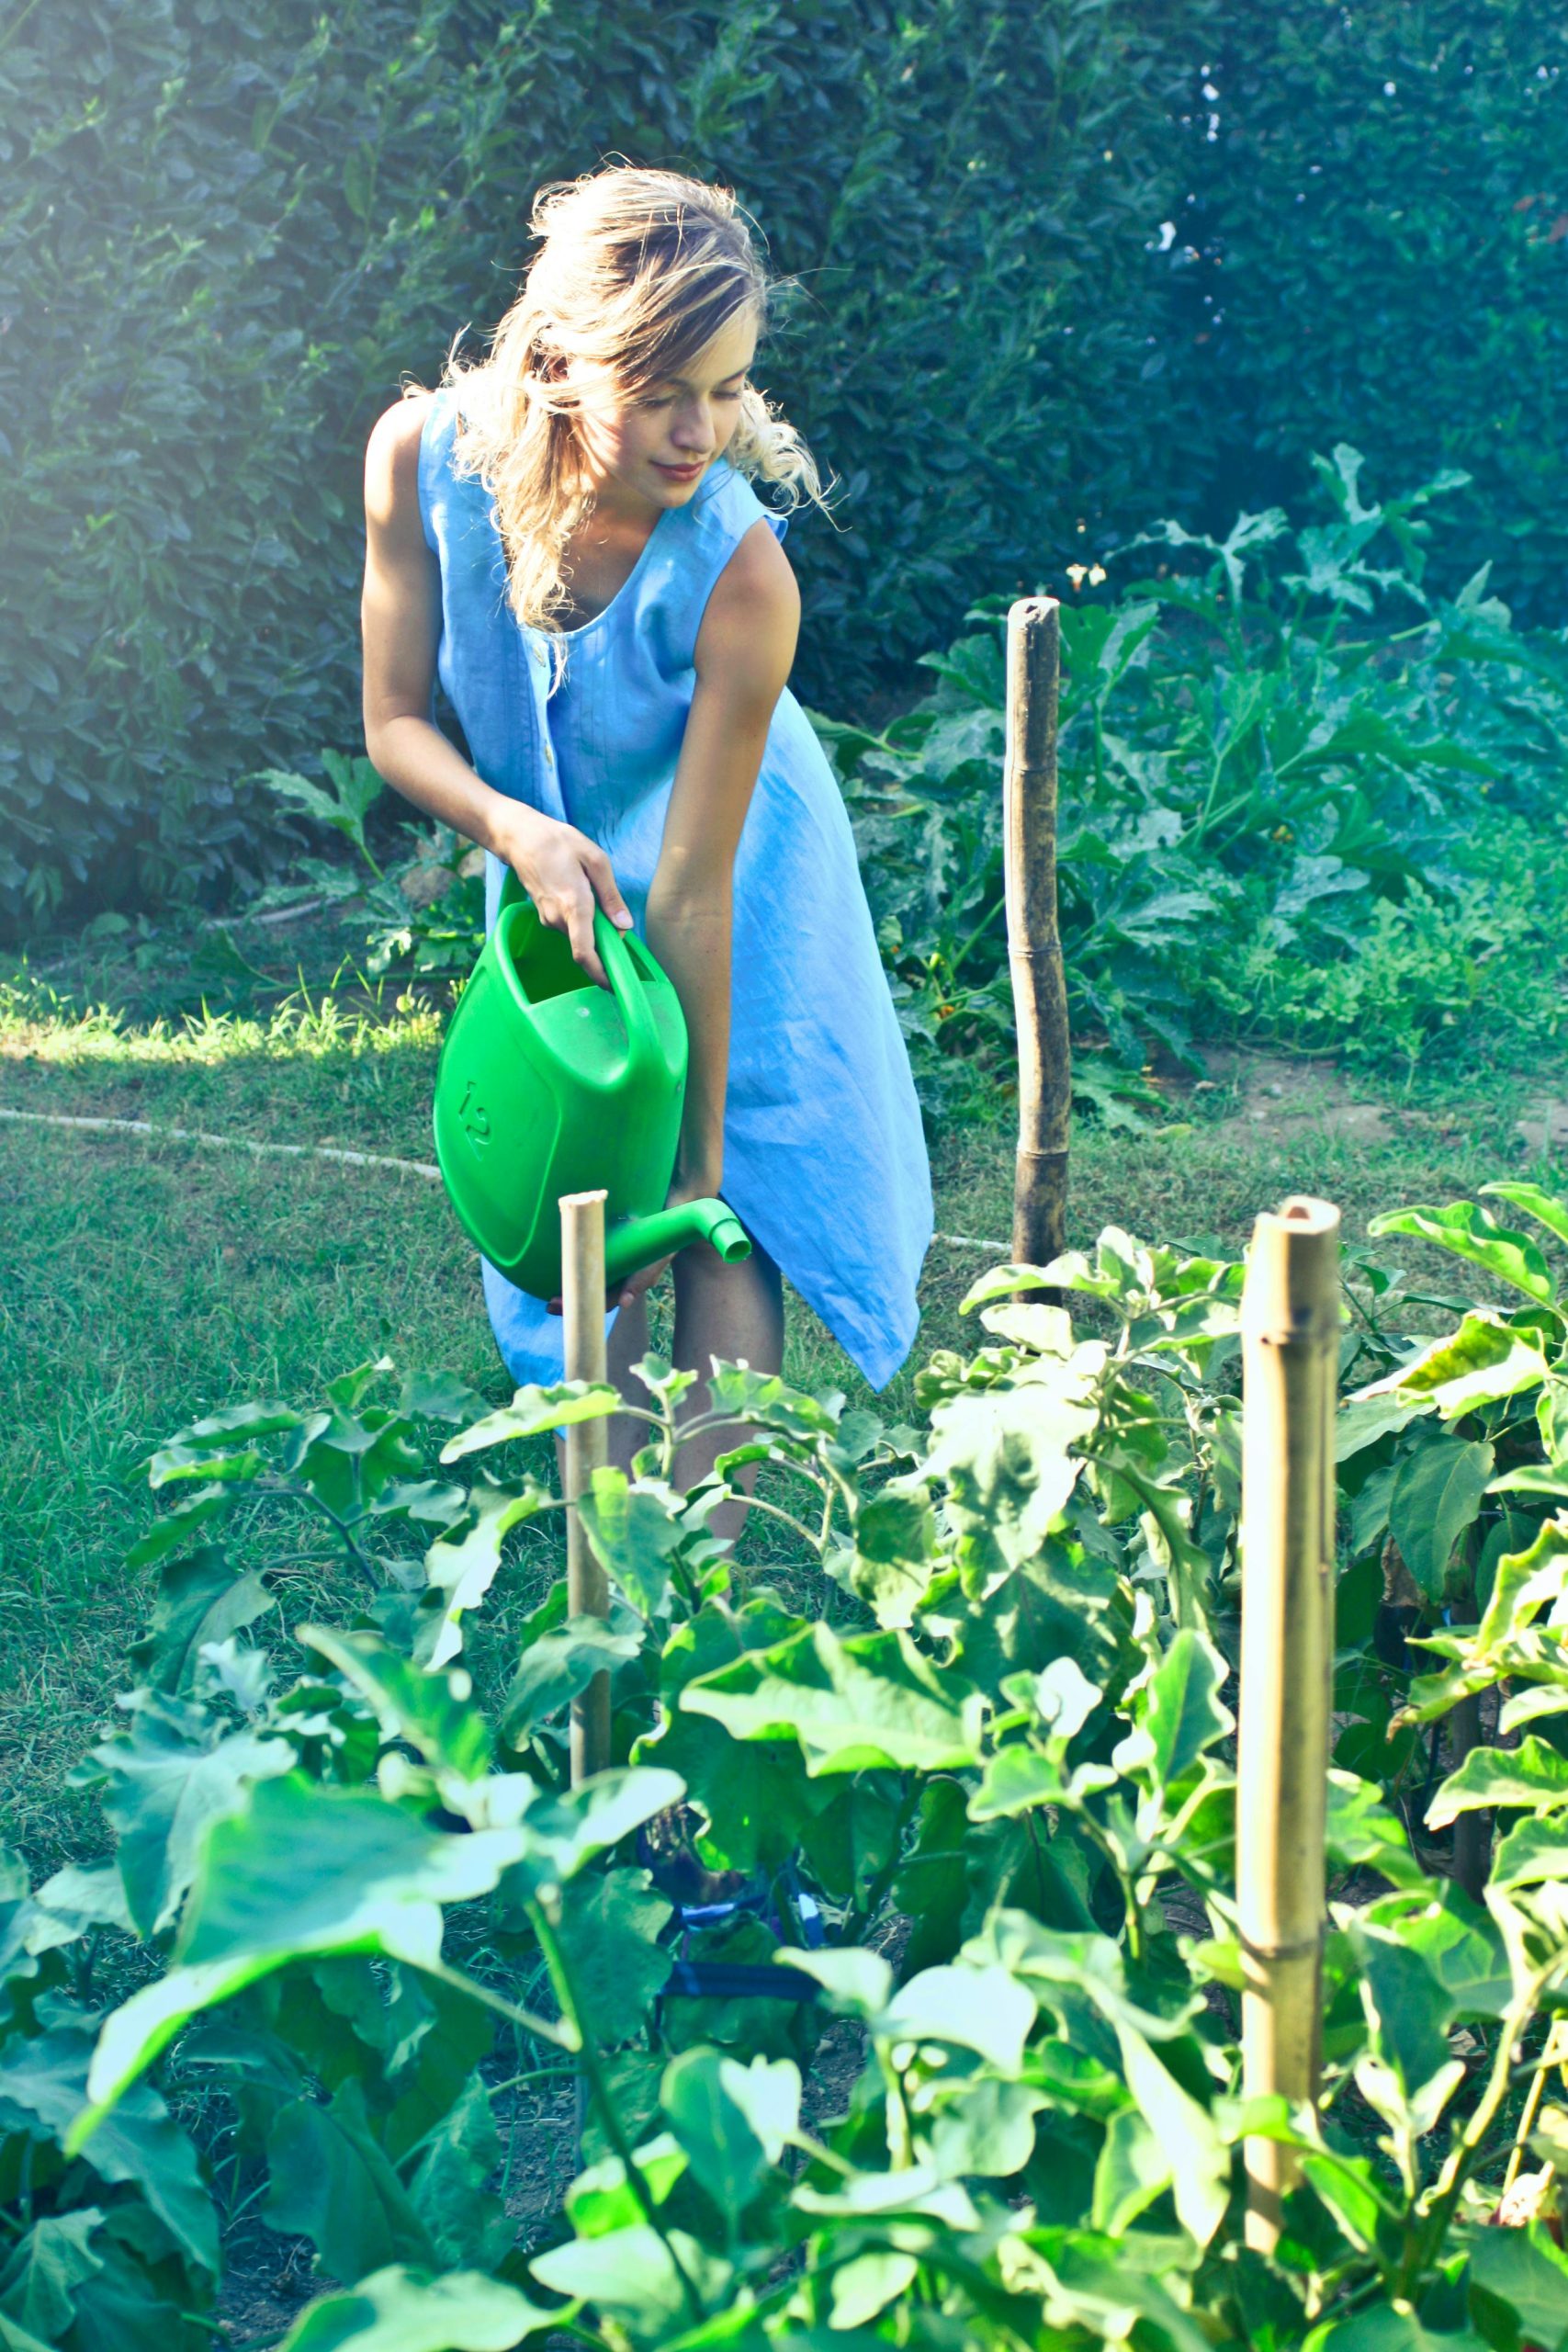
We ‘d labored as a household to build a terrific. raised veggie garden . We adoringly planted half a dozen tomato plants and thoroughly cared for a handful of cucumber, pepper, squash and melon plants, excitedly expecting a summer season filled with fresh, homegrown fruit and veggies on the dinner table.
Fast forward a couple of weeks and our beautiful garden was thriving however nothing was growing ripe. Squirrels.
The furry little animals were pillaging our stunning garden, and what made it even worse was that they weren’t even taking pleasure in the fruits of our labor-they discarded them after simply one sour bite. We were determined to put an end to this vicious circle by constructing a squirrel-proof enclosure for our garden.
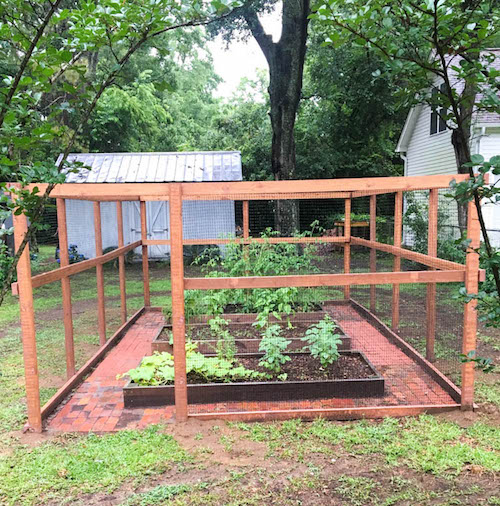
With an army of pine boards, a handful of landscape poles, a roll of rubberized hardware cloth and some bird netting, we constructed an animal proof 12-by-24-foot animal proof garden.enclosure and provided our garden a chance at a new life.
This summer it produced in spades, gifting us with tasty ripe red tomatoes, lots of bell peppers, crisp cucumbers and sumptuous zucchini. The squirrels searched helplessly from behind the barrier, contenting themselves with the generous acorns from our many oak trees.
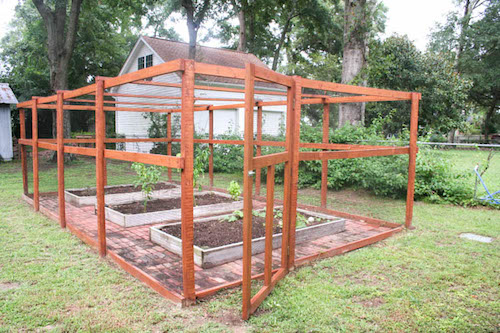
Our completed garden enclosure.
The beds are preparing yourself for our fall plantings, which is why they look a little bare, however they actually produced for us this summertime!
Here is the garden earlier in the summertime, during construction. We still had to put the door on.
Here’s how we built our veggie garden rescuer.
Materials
- 20 pine boards, 12′ x 2 x 4.
- 12 landscape poles, 8′ tall.
- A box of 2.5 galvanized screws.
- One pack of screw-in hooks.
- A roll of rubberized/PVC hardware fabric.
- Bird netting.
- Quickcrete.
- 1 gallon can of exterior wood stain.
- Kreg jig.
- Miter saw.
- Power drill.
- Level tool.
- Essential weapon.
Step One: Measure
We measured the entire location we wished to confine, plus enabled my 6-foot-4 husband to be able to stand in the garden. This resulted in a 12 ft. wide by 24 ft. long and 8 ft. high structure. It was a fair bit bigger than we ‘d anticipated, but the very best solution if we wished to have the ability to enter into the garden easily.
Step Two: Gather Your Materials
We had a huge area we needed to confine, as we paved around the 3 raised beds we developed. This suggested we needed 20 posts for the fence of our enclosure and the roof supports and 12 landscape poles for the fence posts. You won’t require so much lumber if you have a smaller location to cover 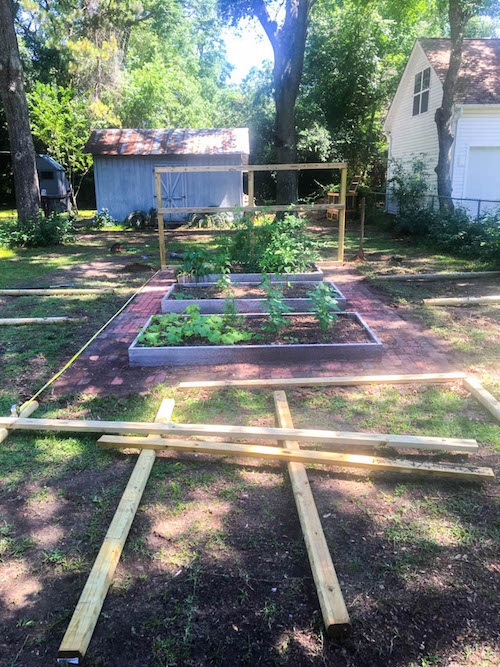
Step Three: Build Your Fence
We built each side of the fence separately. We buried the landscape posts at each end, then put the middle posts in. We buried them about a half and a foot down and poured a bit of Quickcrete in each hole to keep the post steady.
Next, we took the 2 x 4 slabs and positioned them horizontally along the posts, one a little over halfway up and the other on the top. We utilized a level to make certain each side was directly, and attached the planks by drilling in 2.5-inch galvanized screws. We constructed 3 sides of the fence in this manner, and after that made the 4th side about four feet much shorter to allow space for a door. We then positioned three of the slabs along the top of the structure to produce our roofing, going from landscape post to landscape post and securing them with screws 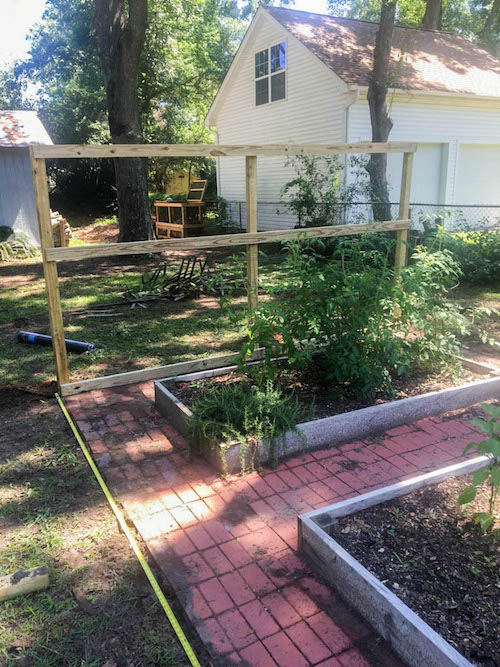
Step 4: Develop Your Door.
While the enclosure requires to keep the squirrels out, we required a method to get in! Using the exact same landscape poles for a frame, we developed a door 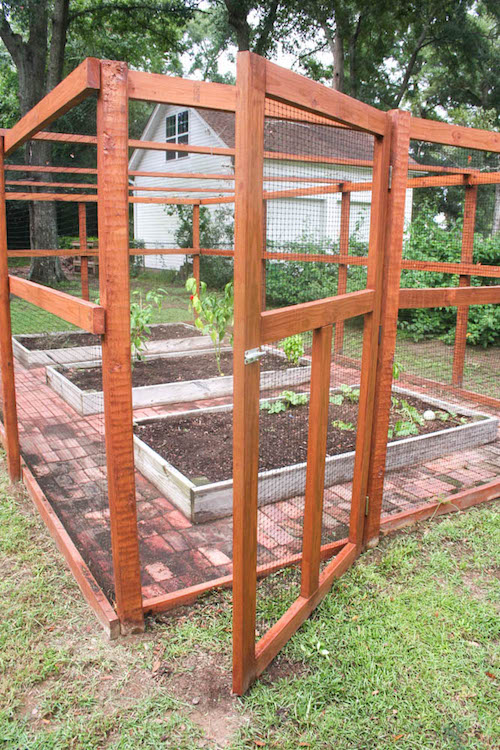
Step Five: Stain Your Frame
Once the door and the frame were constructed, we put a coat of outside grade wood stain on the pine to protect the wood and assistance mix it in with its surroundings.
Step 6: Wrap Your Garden Enclosure
Now we simply needed to cover the sides to keep those animals out. We decided to use a rubberized hardware fabric that we wrapped around the entire structure (minus the top) and connected with a staple weapon. If you require something tougher to stay out larger animals, use steel hardware cloth-just understand that it costs about double.
For the top, we chose a more fragile bird netting, which we can more easily remove ought to we desire to. We attached it with screw-in hooks dotted along the assistances that go throughout the roofing system 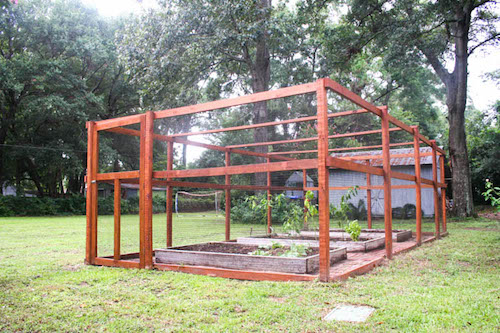
We are really delighted with our ended up squirrel-proof vegetable garden enclosure. It’s certainly been a labor of love, however we are anticipating gaining the bounty of our efforts by taking pleasure in fresh, homegrown fruits and veggies for several years to come.
Looking into the finest ways for securing gardens against squirrels prior to planting is a great idea if you are planning to plant a garden. We learned this the difficult way.
We would also recommend preparing the beds and after that waiting on planting until the squirrel proof garden fencing is up. As soon as they begin growing, you don’t desire to interrupt the plants.
Article source: http://naturallysavvy.com/nest/how-to-build-a-squirrel-proof-enclosure-for-your-vegetable-garden
SHARE IT SO OTHERS CAN FIND THE BEST GARDENING INFO


