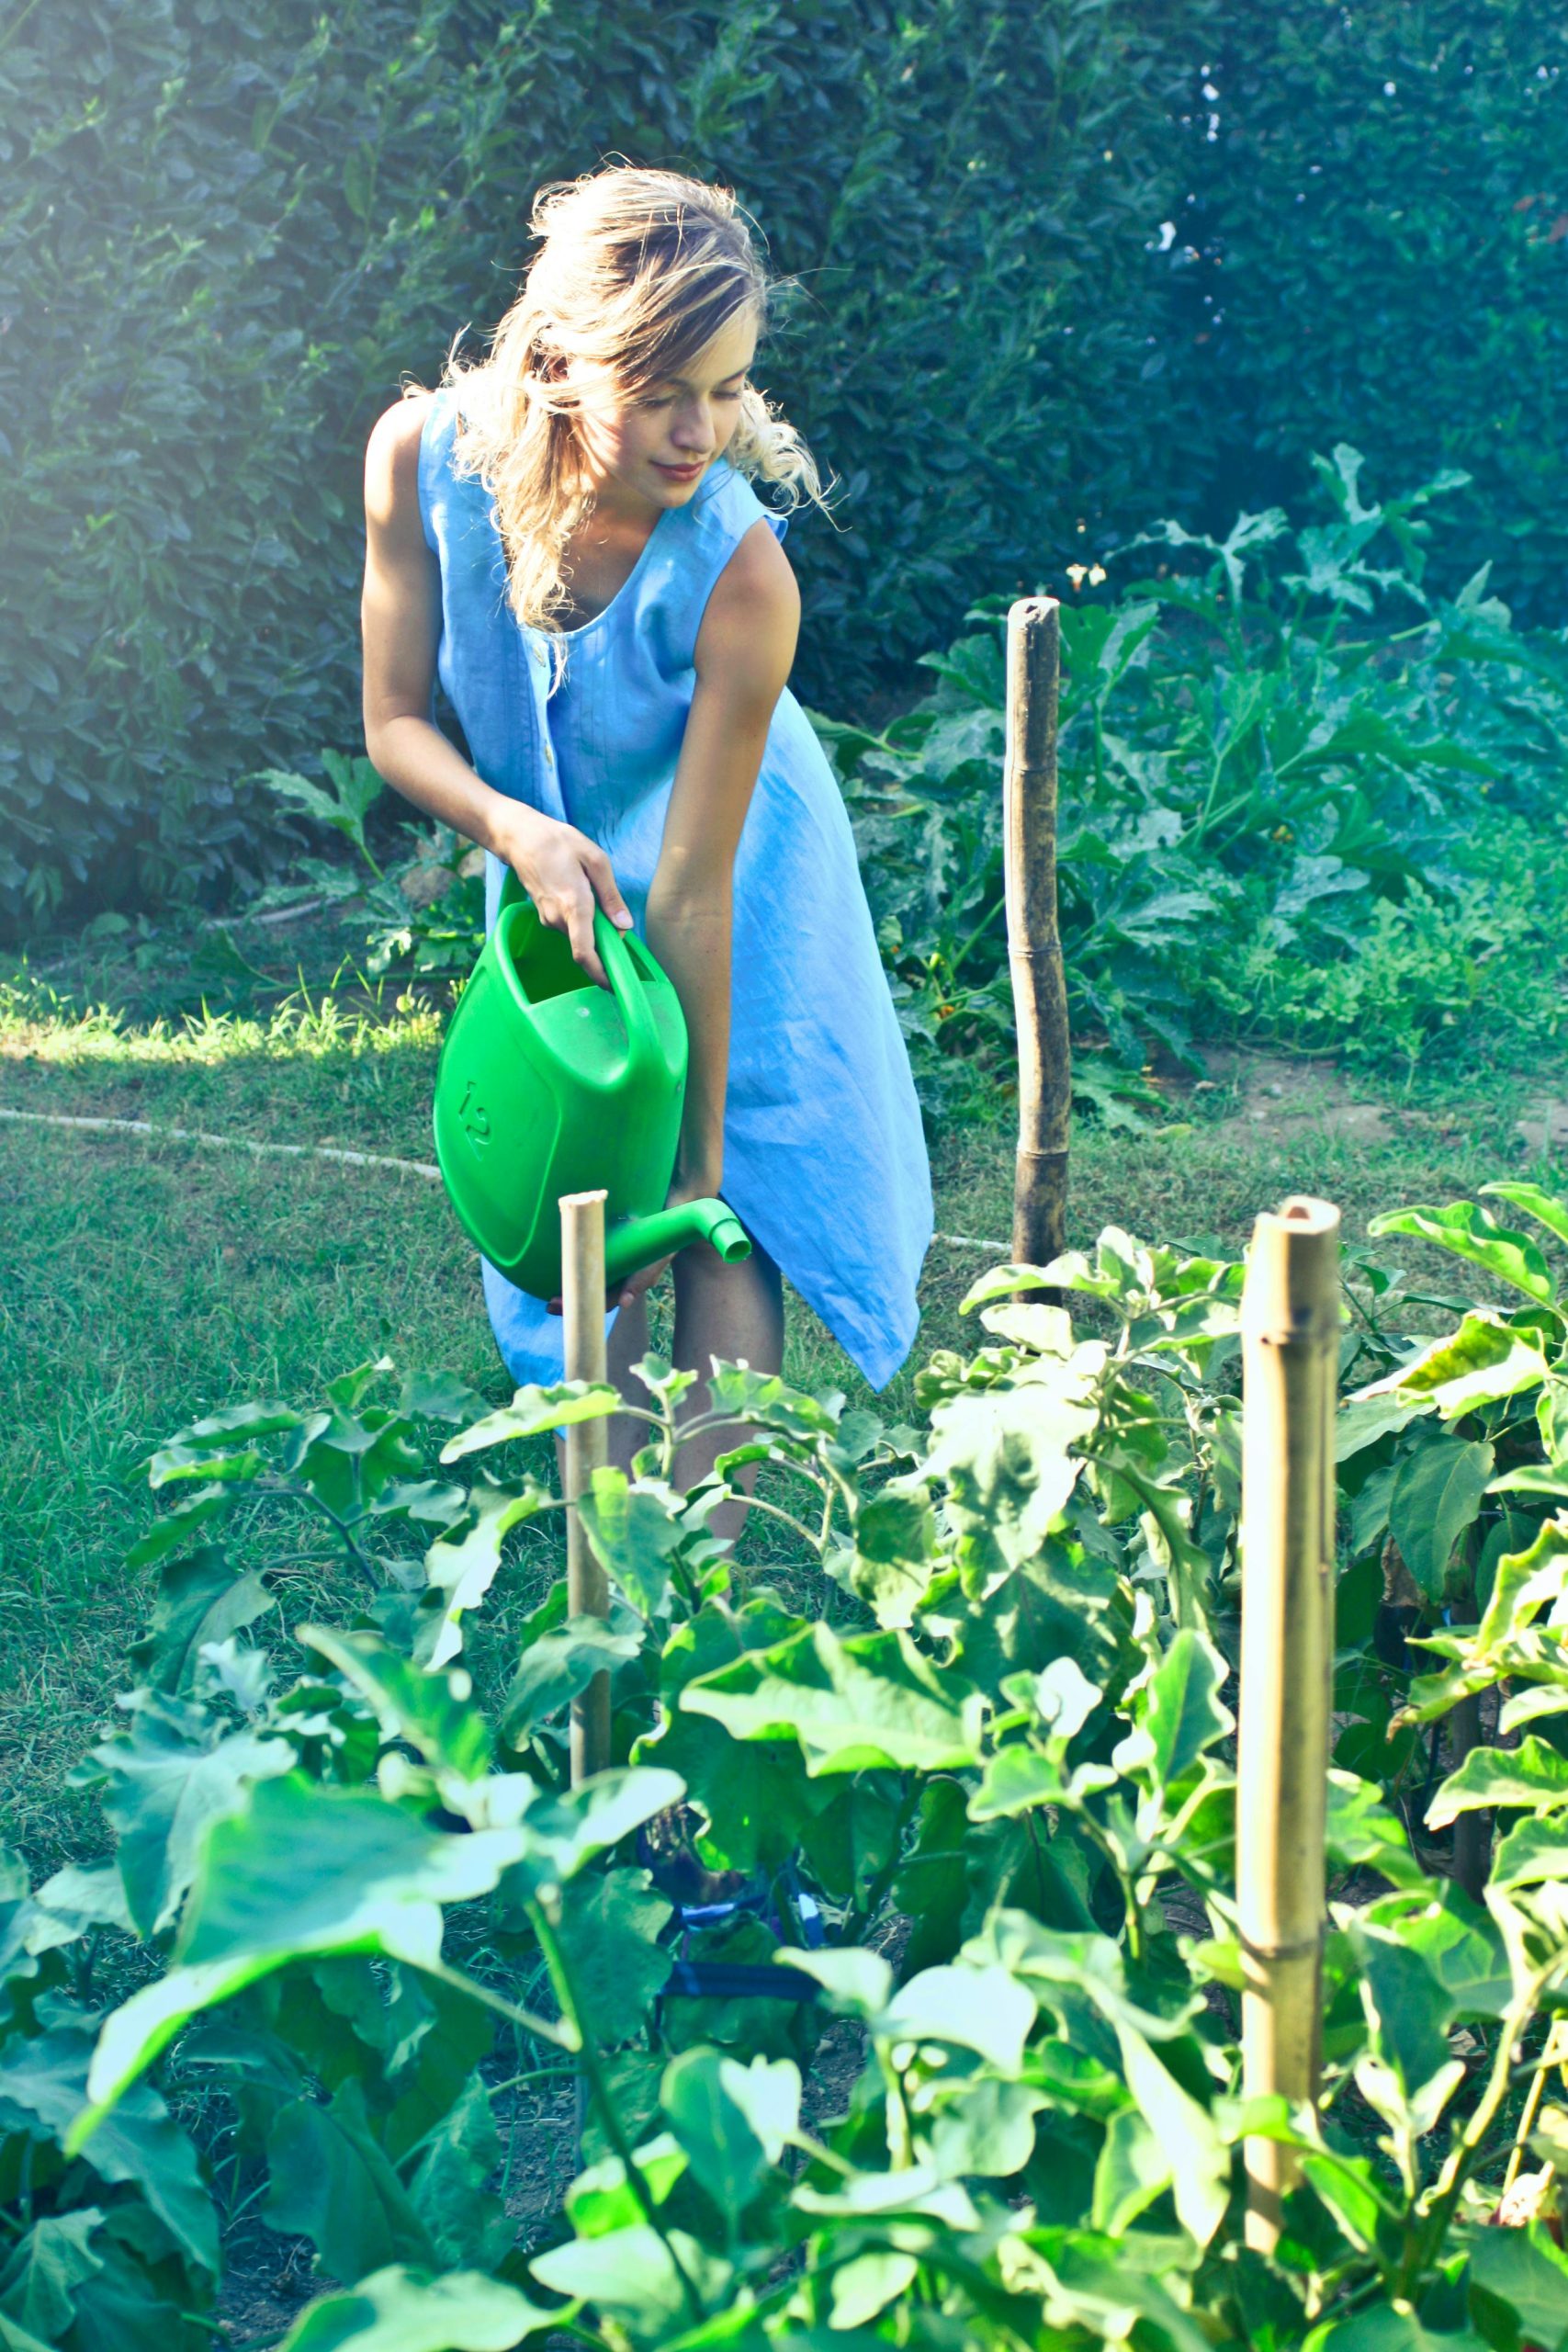
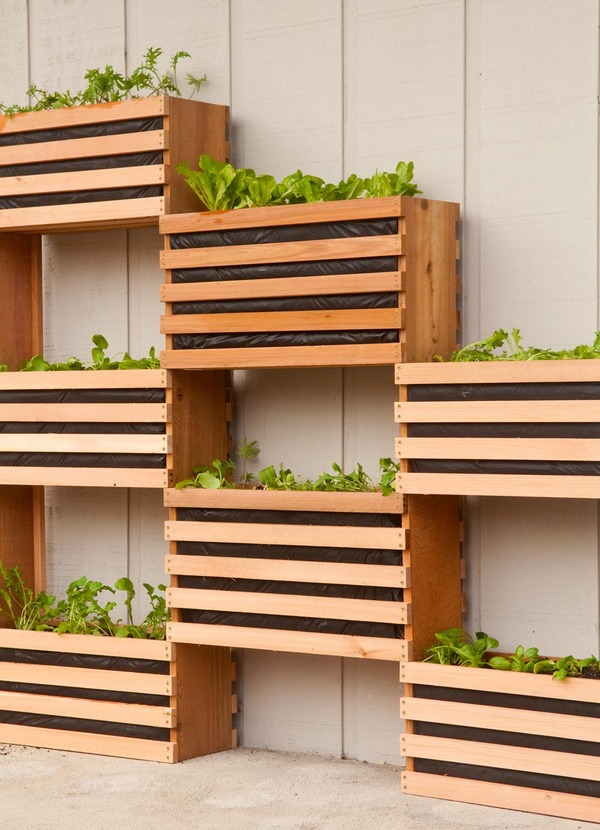
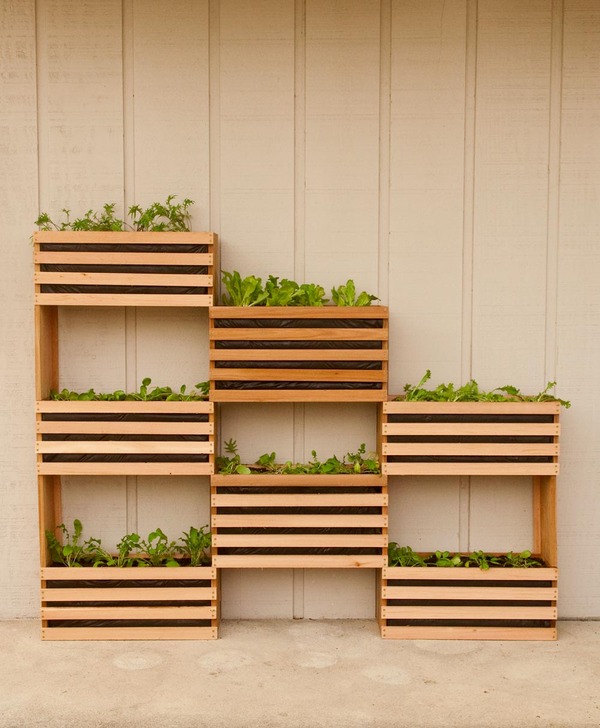
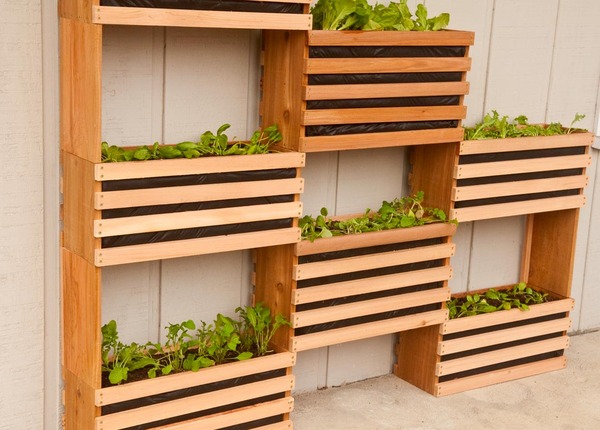
This modern, modular garden project functions well in any type of space. Since it uses timber containers, you do not need to worry about the quality of your existing dirt, and also they could rest on any type of surface: lawn, concrete, crushed rock or perhaps a wood deck. The yard’s upright alignment lets you grow an entire bunch of veggies, natural herbs, and blossoms in a small footprint.The boxes are customizable to fit your space – all you need is solid wall or fencing to affix the framework to, as well as you could place this individual anywhere.
Devices and Materials:
- Miter or round saw.
- Cordless drill and also 1/2 inch drill little bit.
- Staple weapon and 1/2 electric cord staples.
- Hammer.
- Measuring tape.
- Gloves.
- Safety and security glasses as well as dirt mask.
- Pencil.
- Scissors.
- Tin snips or reducing pliers.
- 3x 8′ long cedar 1x8s.
- 4x 8′ lengthy cedar 1x3s.
- 16x 8′ lengthy cedar 1x2s.
- 1 roll of cord hardware towel, 1/2 space.
- 1 roll weed blocker textile.
Constructing the Boxes:
I constructed my job out of one-by cedar product. Given that my garden was mosting likely to be outdoors, I knew it would have lots of call with water and also direct sunlight, so I picked cedar for its natural decay-resistant homes. I would certainly never use pressure-treated lumber for this, as it has chemicals that will seep right into the dirt where my edibles are expanding.
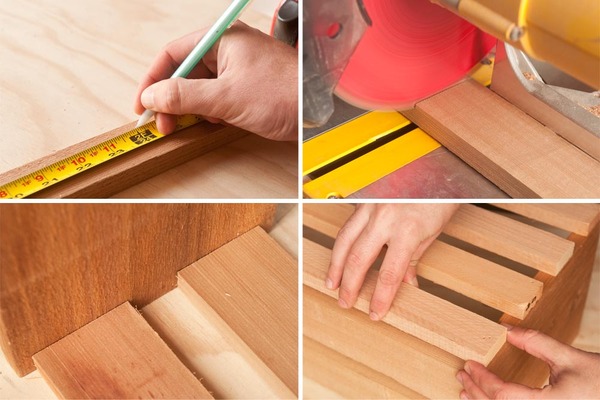
The main boxes measure 10 high by 23 long and also 7 1/4 vast. The sides are made from cedar 1x8s, reduced to 10. Two cedar 1x3s comprise the base, 21 1/2 in size, to provide the bottom toughness. Note that this is not a strong bottom, to make sure that the soil can have proper drainage. The 1x3s are spaced equally across the base..
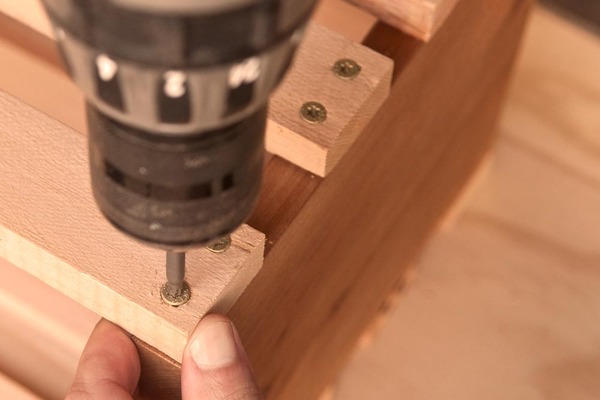
The slats on the sides are made from cedar 1×2 product, reduced to 23. This dimension enables you to make use of an 8′ 1×2 to cut 4 slats for the front, while enabling waste from the saw kerf. Be sure certain to position them purge with the top and bottom of the box, hiding the 1×3 base when viewed from the front. Just area them equally by eye, regarding 1 to 1 1/2 apart. Affix them with 1 1/2 long # 8 outdoor decking screws. Because you’re screwing so near the side of the timber, you’ll absolutely desire to drill pilot openings to stop splitting the wood..
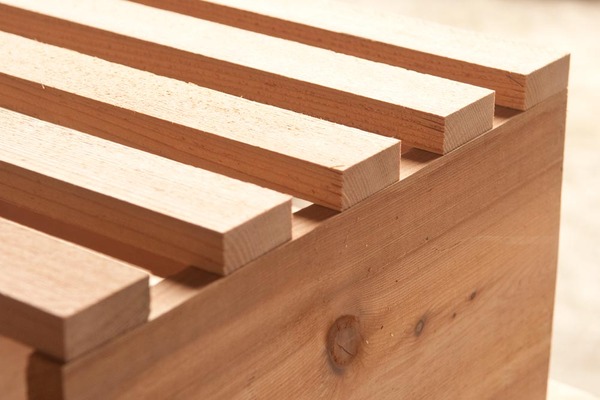
To provide the covered boxes a bit even more room, the center boxes are 12 3/4 high, as well as make use of 5 slats making up the front as well as back.

When your boxes are set up, reduced 1/2 fit together hardware towel utilizing snips or reducing pliers, and staple it to the 1×3 base making up all-time low of packages.
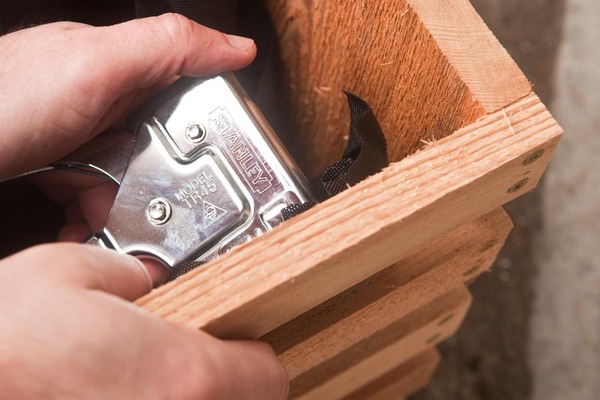
Line the sides and also the base with weed obstacle towel. This is, unquestionably, the hardest component, as the cloth is elastic as well as can be a bit unwieldy. Beginning by reducing the weed barrier to length, leaving an extra inch approximately on each side. To figure out the size, wrap it around the outside of the two sides and the base, like you would certainly when wrapping a present. Cut to dimension, after that staple to the leading slat of one side, and also work your method down all-time low, across, and also up the opposite side, making use of great deals of staples to keep things taut..
Setting up the Framework:
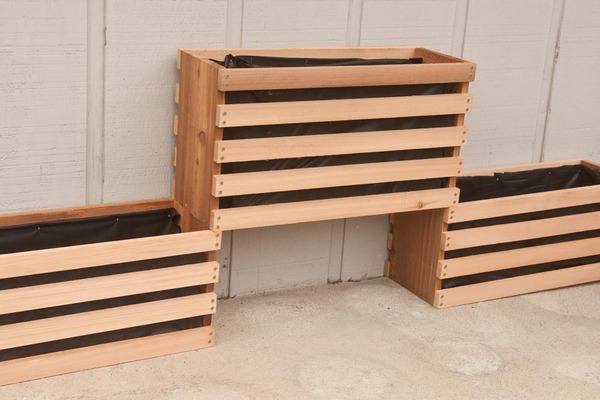
Begin by placing 2 of the shorter boxes on the ground, and include a taller box to cover the void. Once you enjoy with their placement, screw them to the backing product (the fence, wall, or just what have you).
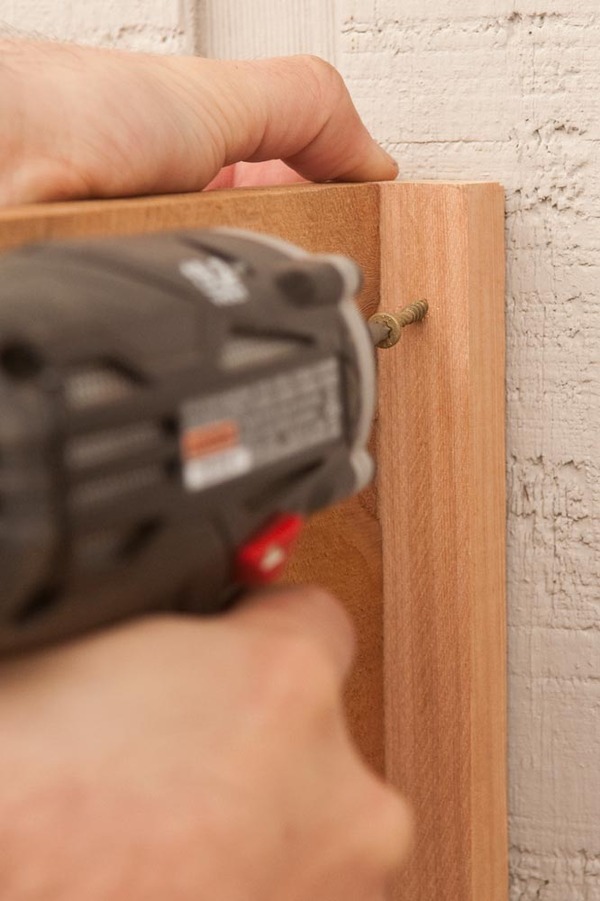
The boxes are sustained with an easy L-shaped riser. It’s reduced to the very same height as the taller boxes – 12 3/4 – and is an item of 1×8 with a 1×2 screwed perpendicularly to the back. This provides is a face to screw into the wall surface. Line it up very carefully with the bottom box, and connect.
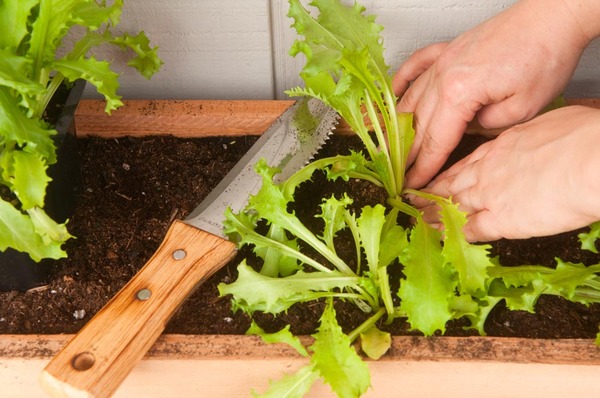
Continue to construct your framework till all the boxes and risers are affixed and protected. Then, load them with potting dirt, and add your plants
.
Article source: http://www.manmadediy.com/users/chris/posts/3582
📅 Last updated:
SHARE IT SO OTHERS CAN FIND THE BEST GARDENING INFO


