Starting seeds is much easier if you have all you need in one place, so I find these seed planting stations very handy. Then all that is required is to place the peat etc. that is going to be used, in the station’s tray and – hey presto! off you go.
Everything can be done at waste height and so makes the the job very comfortable. Having a container like this for planting seed made of plastic makes it easy to wash and sterilise too.
A word about the ‘soil’ you will be starting seeds in. The ‘soil’ is called compost but in this context it does not mean the compost we make in our compost heap – it can do, if your home made stuff has been rotted down well then sieved and sterilised. But generally it refers to the compost we purchase from our local garden center or nursery.
Garden compost is supplied in various size bags from just a few litres to 70(plus) litres. There are two types that will concern you the most – ‘seed sowing’ or ‘multi-purpose’ compost.
The seed sowing compost is used as the name implies and contains the right amount of nutrients to give your vegetable seed a good start on the road to being eaten.
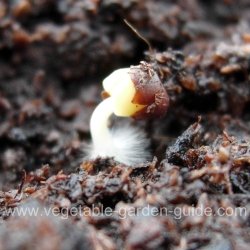
The multi-purpose compost (this is can also be described as ‘potting compost’) is used to transfer or pot-on the seedlings when big enough for the next stage of growth prior to transplanting. Potting-on can be into individual pots – usually approximately 8cm(3″), depending on the vegetable plant. Or into larger trays with more spacing between plants.
It is worth mentioning also that there are peat free composts now available so ask about these at your garden centre should this be an option you’d like to try.
So! Let’s get started – after digesting the following photos you will wonder why you ever thought starting seeds was difficult.
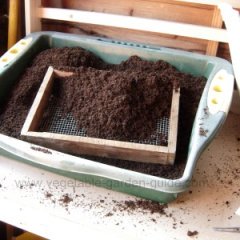 Place some peat into your sowing station and if possible have a sieve available. I made this sieve myself from four pieces of wood nailed together and 6mm(¼”) wire mesh nailed to the edges. |
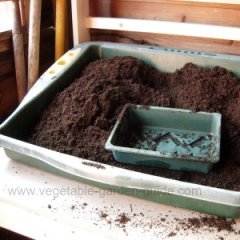 Here I am using a small tray or flat for starting seeds. I’m not sowing the vegetable seeds in large quantities so this will be plenty big enough. |
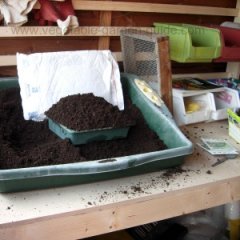 Overfill the tray with peat. |
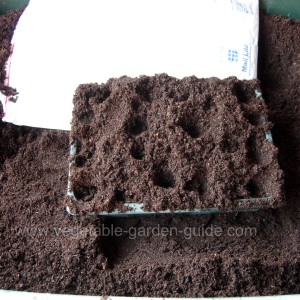 Using your fingers just gently prod them into the peat to make sure that there are no spaces below the surface of the peat, especially around the edges and in the corners. Don’t press down too hard as you will not want to compact the peat. |
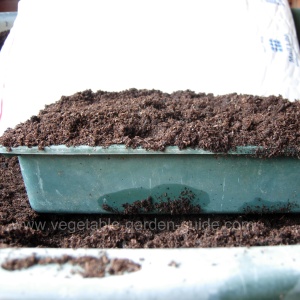 Overfill the tray again with peat and this time give the tray a little shake and a couple taps on the bottom of the seed sowing station to settle the peat into the spaces on the surface – don’t press the peat down at this point. |
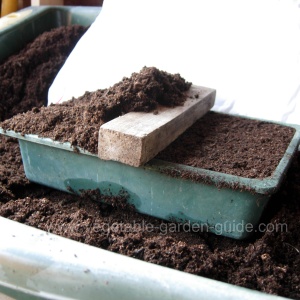 Get a small piece of wood as illustrated above and placing it on the top edges at one end of the tray just slide it along the top and slice off the excess compost. |
 Once that is done you will have a nice clean ‘canvas’ on which you will be starting seeds – just one more step to go though before you sow. Take your length of wood and gently press down the peat over the whole area of the tray to about ½” below the top – well done… you’ve completed this stage – give yourself a pat on the back. |
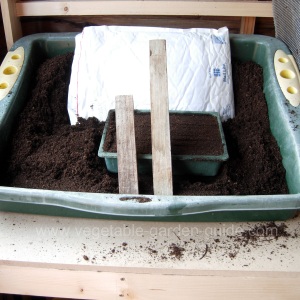 Apart from a sieve, what you see here are the ‘tools’ I use for starting seeds. Essentially a seed planting station, peat, a tray for the peat and vegetable seed to be placed into and two sizes of wooden baton for large and small trays (or flats). If your wondering, the white envelope was just to act as a background to the photos to give a greater contrast to the tray profile – I’m not really geekish ;-). |
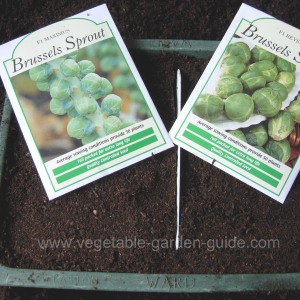 Here is the tray (or flat) prepared and ready for starting seeds and in this tray I am planting seed of the brussel sprout vegetable. I am sowing seed of two different varieties – one will crop earlier than the other so giving me an extended harvesting period into the following year. |
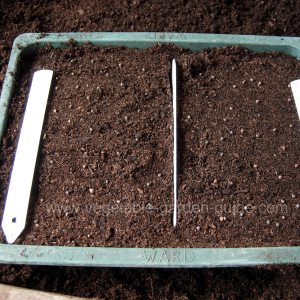 You should be able to make out where I have sprinkled the vegetable seeds over the surface of the peat/compost. Also, take note how I have divided the tray in two by using a plant label as a seperator through the middle. The seed has not been sown too closely together to prevent overcrowding. |
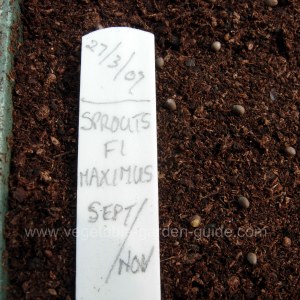 When starting seeds it is good practice to label them. As you can see here I have made a plant label clearly showing the: date of sowing, the type of vegetable, the vegetable variety and the expected cropping period. |
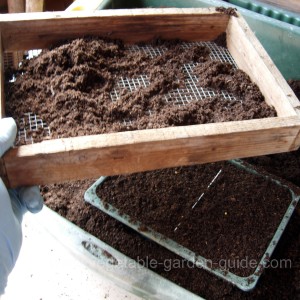 To finalise the second stage I now use my home made sieve to sprinkle peat over the seeds so seed growth can begin. The final depth of the seed can be found from seed packets but as a rule of thumb the larger the seed the deeper you will set them. Very fine seed will not need to be covered at all but just pressed into the surface. |
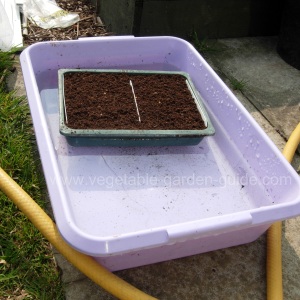 Your sown vegetable seeds will now need to be watered prior to placing them in their final resting place where they will germinate. I don’t like watering from above when starting seeds as the danger is the water dropping from above will be too harsh and disturb or even wash out the seeds. My prefered method is to get a large tray – a cat litter tray is ideal (as above) partially fill with water then place your seed tray onto the water ensuring you have not filled it enough to overflow over the surface of the seed tray. |
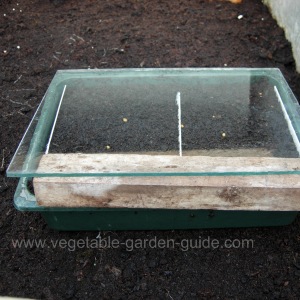 I place my completed seed trays in a heated propagator in my greenhouse. I like to cover them with a piece of glass to keep in the moisture and warmth, so I place the plant labels down the edges of the trays on the appropriate sides. When the seeds are begining to germinate I remove the glass and place the labels in an upright position. Placing a piece of glass on the tray is not necessary so don’t be too bothered by this. Keep the trays moist but not water logged. |
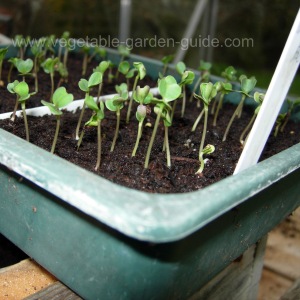 The picture above shows the brussels sprout seedlings begining to grow. The leaves that are showing are not true leaves but are what are termed the seed leaves and are what the plant fed off as it germinated. Once a couple of true leaves have grown I will pot-on into a bigger tray or more likely into seperate pots as mentioned earlier. |
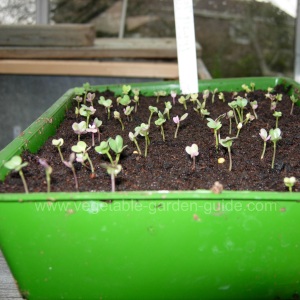 Here is another example of a tray of germinated seedlings. These are purple sprouting broccoli. |
Here are a few more tips for starting seeds… are you ready – ok!
Warmth – most seeds require a reasonably warm temperature of approximately 18-21°C for satisfactory germination. A propagator which is thermostatically controlled is ideal – these can be bought at a reasonable price. If you are starting seeds on a windowsill a centrally heated room is best were the temperature can be kept reasonable stable – try a bit of experimentation.
Light and Water – A few days after your vegetable seeds have germinated move your seed container to a brighter but sunless spot. Pots or trays on windowsills should be turned every couple of days and never let the compost dry out. Use a fine sprayer to keep the surface moist.
Prick Out – As mentioned above… as soon as the first true leaves have formed transplant the seedlings into pots or trays filled with multi-purpose compost – the seedlings set 2.5-4cm(1-1½”) apart. High temperatures are not necessary now, 10-12°C is ok. Try keeping them in the shade for a day or two after pricking out and water as necessary.
Harden Off – this last stage when starting seeds is important. After your seedlings have grown on and are ready to be transplanted they need a period of preparation to get them ready for a life outdoors. Move them outside to a coldframe if you have one, keeping the lids closed for about 7 days then begin by opening them during the day when frost is not about. Eventually keep them open day and night for several days just prior to planting out. Seedlings on a windowsill can be moved into an unheated room for a week or so then stood outside before transplanting.
… and remember just keep experimenting and experience wins through in the end – those who fail are the one’s who give up and you’re not that type, are you? 😉
Right! – Over to you and good luck…
Article source: https://www.vegetable-garden-guide.com/starting-seeds.html
SHARE IT SO OTHERS CAN FIND THE BEST GARDENING INFO
